


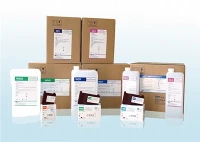


Hey there! As a supplier of biochemistry analyzers, I often get asked about how to load samples into these nifty machines. It might seem a bit daunting at first, but with the right know - how, it's a breeze. In this blog, I'll walk you through the process step by step.
Why is Proper Sample Loading Important?
Before we dive into the actual process, let's talk about why it matters. Loading samples correctly is crucial for accurate test results. If samples aren't loaded right, it can lead to false readings, which can have serious implications in a medical or research setting. For instance, in a hospital, incorrect test results could lead to misdiagnosis and improper treatment. So, getting it right from the start is super important.
Types of Biochemistry Analyzers
There are different types of biochemistry analyzers out there, and the sample - loading process can vary a bit depending on the model. Two common types are semi - automatic analyzers. You can check out our Semi - automatic Biochemical Analyzer and Biochemistry Semi Auto Analyzer for more details on these types.
Preparing for Sample Loading
First things first, you need to make sure your analyzer is all set up and ready to go. Check that the analyzer is plugged in, turned on, and has been properly calibrated. Calibration is like tuning a musical instrument; it ensures that the analyzer is measuring things accurately. You should also check that all the necessary reagents are available and in good condition. Reagents are the substances that react with the samples to produce measurable results.
Next, gather your samples. Samples are usually collected in special tubes, like blood samples in vacutainer tubes. Make sure the samples are labeled clearly with the patient's or sample's information. This helps prevent mix - ups and ensures that the results are associated with the correct individual or sample.
Loading Samples into a Semi - Automatic Biochemistry Analyzer
Let's focus on semi - automatic analyzers for now. These are a popular choice in many smaller labs and clinics because they're relatively easy to use and cost - effective.


- Open the Sample Tray: Most semi - automatic analyzers have a sample tray where you place the sample tubes. Open the tray carefully. Some trays might be locked, so you may need to use a key or a release button to open it.
- Arrange the Sample Tubes: Place the sample tubes in the designated slots on the tray. Make sure they're seated properly and not wobbly. The tubes should be placed in the order you want the analyzer to test them. Some analyzers allow you to program the order of testing, but if not, physical arrangement is key.
- Enter Sample Information: On the analyzer's control panel, you'll need to enter the relevant information about each sample. This includes the sample ID, which is usually a unique number assigned to each patient or sample. You may also need to enter details like the patient's age, gender, and the type of test you want to perform. Some analyzers have a barcode scanner that can read the information on the sample tube label, which makes this step much quicker.
- Select the Test Parameters: Depending on what you're testing for, you'll need to select the appropriate test parameters. For example, if you're testing for glucose levels in a blood sample, you'll need to choose the glucose test option on the analyzer. The analyzer will then use the right reagents and settings for that specific test.
- Start the Analysis: Once you've loaded the samples and entered all the information, it's time to start the analysis. Press the start button on the control panel. The analyzer will then aspirate a small amount of the sample from each tube and mix it with the appropriate reagents. The reaction between the sample and the reagents will produce a signal that the analyzer can measure and convert into a test result.
Tips for Smooth Sample Loading
- Keep it Clean: Make sure your hands are clean before handling the sample tubes. Any dirt or contaminants on your hands could get into the samples and affect the results. Also, keep the sample tray and the analyzer's interior clean. Wipe them down regularly with a suitable cleaning solution.
- Check the Sample Volume: Different tests require different sample volumes. Make sure you have enough sample in each tube for the tests you want to perform. If the sample volume is too low, the analyzer may not be able to get an accurate reading.
- Handle Samples Carefully: Avoid shaking or jostling the sample tubes too much. Vigorously shaking a blood sample, for example, can cause hemolysis (breakage of red blood cells), which can interfere with the test results.
Troubleshooting Sample Loading Issues
Sometimes, things don't go as smoothly as we'd like. Here are some common issues you might encounter when loading samples and how to fix them:
- Sample Aspiration Failure: If the analyzer fails to aspirate a sample, it could be due to a clogged needle or a problem with the aspiration pump. Check the needle for any blockages and clean it if necessary. You can also try running a pump flush program to clear any blockages in the pump.
- Incorrect Sample Information: If you notice that the sample information entered on the control panel is incorrect, stop the analysis immediately. Correct the information and restart the analysis.
- Sample Contamination: If you suspect that a sample has been contaminated, discard it and collect a new one. Make sure to clean the sample tray and the aspirating needle thoroughly to prevent further contamination.
The Importance of Regular Maintenance
To ensure that your biochemistry analyzer continues to load samples accurately and produce reliable results, regular maintenance is a must. This includes cleaning the analyzer, replacing worn - out parts, and performing regular calibration checks. A well - maintained analyzer will have a longer lifespan and will provide more consistent results.
Conclusion
Loading samples into a biochemistry analyzer is a process that requires attention to detail and a bit of practice. By following the steps I've outlined in this blog, you can ensure that your samples are loaded correctly and that you get accurate test results. Whether you're using a semi - automatic analyzer like our Semi - automatic Biochemical Analyzer or Biochemistry Semi Auto Analyzer, proper sample loading is the first step towards reliable diagnostics.
If you're in the market for a biochemistry analyzer or have any questions about sample loading or analyzer maintenance, don't hesitate to reach out. We're here to help you make the best choice for your lab or clinic and ensure that your testing processes run smoothly.
References
- Biochemical Analysis Techniques Handbook.
- Manufacturer's Manuals for Biochemistry Analyzers.